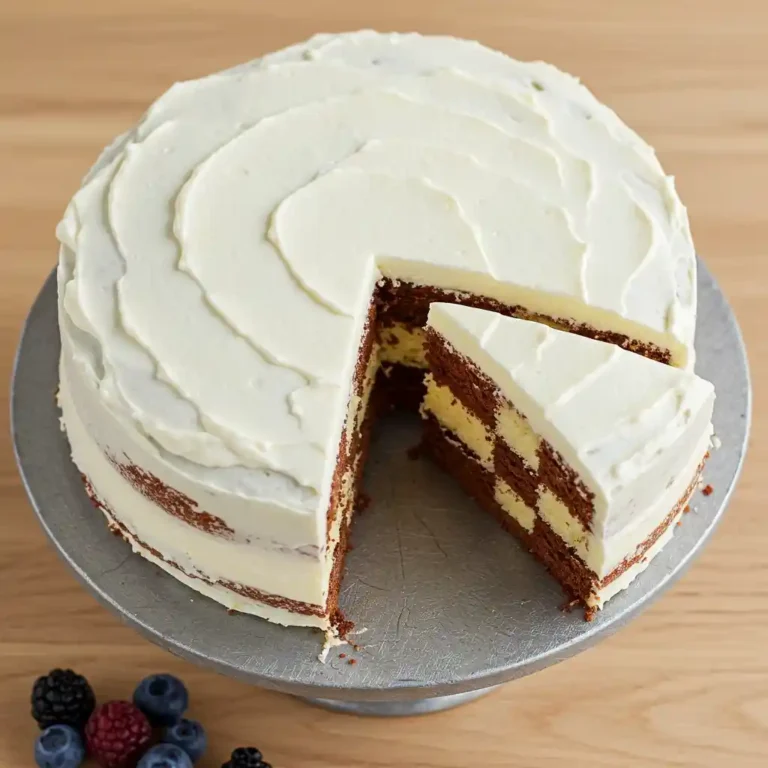
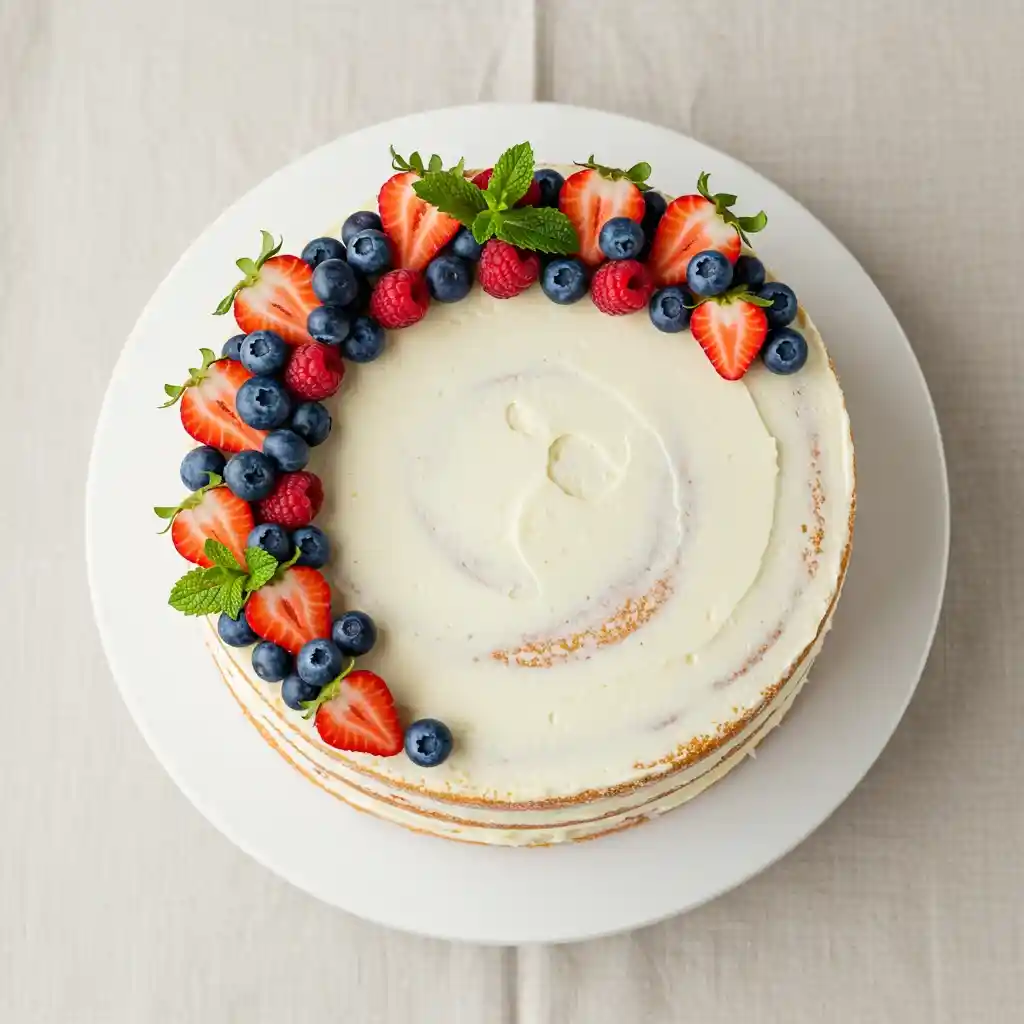
Perfect Vanilla Naked Cake: Tender Layers With Just a Whisper of Frosting
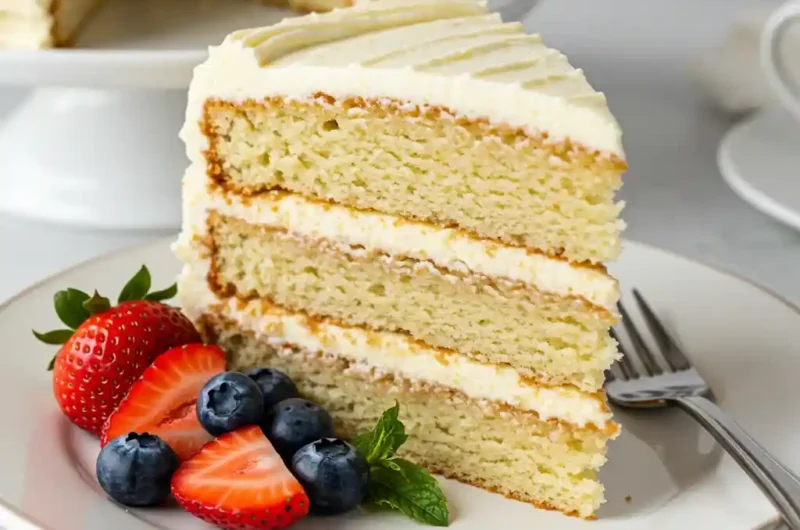
The first bite tells you everything – impossibly tender vanilla cake with a tight, velvety crumb that practically melts in your mouth. Not too sweet, with a subtle buttery richness that lets the pure vanilla flavor shine through. This vanilla naked cake strips away excessive frosting to showcase what truly matters: perfectly executed cake layers with just enough buttercream between them to add creamy contrast. After testing this recipe twelve times, I’ve nailed the balance between structure (it needs to stand tall without collapsing) and tenderness (each bite should dissolve on your tongue). My secret? A touch of sour cream in the batter and cake flour instead of all-purpose.
Why This Recipe Works
- Cake flour creates a finer, more delicate crumb than all-purpose flour, resulting in that professional bakery-quality texture that’s crucial when the cake itself is the star.
- Room temperature ingredients form an emulsion that traps air, giving you a perfectly risen cake without tunnels or dense spots.
- Sour cream adds moisture and tanginess that balances the sweetness while the acidity helps activate the leavening agents.
- Reverse creaming method (mixing butter into dry ingredients before adding wet) produces those tight, velvety crumbs that make naked cakes so visually stunning when sliced.
Ingredient Notes & Substitutions
Cake flour is non-negotiable for achieving that fine-textured crumb. In a pinch, you can make your own by replacing 2 tablespoons of all-purpose flour with cornstarch for each cup needed, then sifting together thoroughly.
Unsalted butter gives you control over the salt content. I prefer European-style butter with higher fat content (like Kerrygold or Plugra) for richer flavor, but any good quality butter works.
Granulated sugar provides just the right sweetness without overwhelming. Don’t substitute brown sugar as it will change both the flavor profile and moisture content.
Sour cream adds moisture and a subtle tang. Full-fat Greek yogurt works as a substitute, though the cake will be slightly less tender.
Pure vanilla extract is essential – this is a VANILLA cake after all! I use Nielsen-Massey Madagascar Bourbon Vanilla for its full-bodied flavor. For special occasions, splurge on vanilla bean paste to get those beautiful flecks throughout the cake.
Whole milk provides fat content necessary for a moist cake. 2% milk will work, but avoid skim milk which lacks sufficient fat.
Egg whites provide structure without the yellow tint that yolks would add, keeping your cake layers a clean white color that looks beautiful in a naked cake presentation.
Essential Equipment
6-inch cake pans (three of them) create the perfect height-to-width ratio for a stunning naked cake. Larger pans will work but produce thinner layers that don’t showcase the “naked” style as effectively. I use Fat Daddio’s aluminum pans for their even heat distribution.
Cake turntable makes frosting a naked cake infinitely easier – you need precision when applying minimal frosting, and a turntable lets you rotate the cake smoothly while working. Even an inexpensive plastic one is better than none.
Offset spatula (both small and large sizes) provides the control needed for spreading thin, even layers of frosting. The small one is perfect for adding just the right amount between layers, while the larger one helps with the minimal exterior frosting.
Bench scraper creates that perfectly smooth semi-naked exterior with just enough frosting to let the cake peek through. The straight edge is key for achieving the signature minimalist look.
Cake leveler or long serrated knife ensures perfectly flat layers, which is critical when building a naked cake as any unevenness will be visible without thick frosting to hide imperfections.
Step-by-Step Instructions
Making the Cake Layers
Preheat your oven to 350°F (175°C). Prepare your cake pans by greasing the bottoms and sides, lining the bottoms with parchment paper, then greasing the parchment.
In a stand mixer bowl, sift together the cake flour, sugar, baking powder, and salt. This removes any lumps and aerates the dry ingredients.
Cut the butter into small cubes and, with the mixer on low speed, add the butter one piece at a time. Continue mixing until the mixture resembles coarse sand with no large butter chunks remaining. This should take about 3-4 minutes.
In a separate bowl, whisk together the egg whites, sour cream, milk, and vanilla until well combined.
With the mixer running on low, pour in half of the wet ingredients. Increase to medium speed and beat for 30 seconds. Scrape down the sides and bottom of the bowl.
Add the remaining wet ingredients and mix on medium for another 30 seconds until the batter is well combined. The batter will be thick and smooth.
Divide the batter evenly between your prepared pans. I use a kitchen scale to ensure exact amounts in each pan – approximately 350g per 6-inch pan.
Tap the pans gently on the counter several times to remove any air bubbles.
Bake for 25-28 minutes, or until a toothpick inserted in the center comes out clean and the tops spring back when lightly pressed.
Cool the cakes in their pans for 10 minutes, then turn out onto a wire rack to cool completely before frosting.
Making the Vanilla Buttercream
In a stand mixer fitted with the paddle attachment, beat the butter on medium-high speed for 5 minutes until pale and fluffy. This incorporates air for a lighter texture.
Add the powdered sugar, vanilla extract, salt, and cream. Start mixing on low until incorporated, then increase to medium-high and beat for another 3-4 minutes until smooth and fluffy.
If the frosting seems too thick, add more cream one teaspoon at a time. If too thin, add more powdered sugar.
Assembling the Naked Cake
Once completely cooled, level your cake layers if needed. A flat top is essential for a stable, professional-looking naked cake.
Place your first cake layer on a cake board or serving plate positioned on your turntable.
Using a small offset spatula, spread about ½ cup of buttercream in an even layer on top of the first cake layer, pushing it just slightly past the edges.
Place the second layer on top and repeat with another ½ cup of buttercream.
Add the final layer upside down (flat side up) on top.
Apply a thin layer of buttercream to the top and sides of the cake – just enough to cover the cake. This is your crumb coat.
Using your bench scraper, scrape off most of the frosting from the sides, leaving just enough to partially show the cake layers through the frosting – this creates the “naked” effect.
Smooth the top with your offset spatula, then refrigerate the cake for at least 30 minutes to set the frosting.
Finish decorating as desired – fresh flowers, berries, or a light dusting of powdered sugar all complement the minimalist aesthetic.
Expert Tips for Success
- Don’t skip sifting the dry ingredients – this prevents lumps in your batter and helps create that fine, tender crumb that’s so important in a naked cake.
- Room temperature ingredients are crucial – cold ingredients don’t incorporate properly, resulting in dense, uneven cake layers. Set everything out at least an hour before baking.
- Measure your flour correctly by spooning it into measuring cups and leveling with a knife, or better yet, use a kitchen scale. Too much flour creates a dry cake.
- Be patient with the reverse creaming method – it takes longer to incorporate the butter into the dry ingredients than you might expect, but this step creates that tight, velvety crumb structure.
- When creating the naked effect, it’s better to start with more frosting and scrape away excess than try to add more later. Apply a complete crumb coat, then gradually remove frosting until you achieve your desired level of “nakedness.”
Flavor Variations
Vanilla Bean Naked Cake
Replace the vanilla extract with vanilla bean paste (same amount) to add beautiful flecks throughout the cake and a more intense vanilla flavor. This elevated version is perfect for weddings and special celebrations.
Lemon-Vanilla Naked Cake
Add 2 tablespoons of fresh lemon zest to the dry ingredients and replace 2 tablespoons of the milk with fresh lemon juice. For the frosting, add 1 tablespoon of lemon zest and 1 tablespoon of lemon juice for a bright, citrusy twist.
Almond-Vanilla Naked Cake
Add ½ teaspoon of almond extract to the cake batter and ¼ teaspoon to the buttercream. Top with sliced almonds around the edges of each layer for added texture and visual appeal.
Storage & Freezing
At room temperature, this cake stays fresh for 1-2 days when stored under a cake dome or in an airtight container.
Refrigerate for longer storage, up to 5 days. The minimal frosting means the cake can dry out more quickly, so wrap the cut edges with plastic wrap after serving.
For freezing, you have two options:
- Freeze unfrosted cake layers wrapped tightly in plastic wrap and aluminum foil for up to 3 months. Thaw overnight in the refrigerator before assembling.
- Freeze the completed cake for up to 1 month. Place unwrapped in the freezer until solid, then wrap in plastic wrap and foil. Thaw overnight in the refrigerator, then 2 hours at room temperature before serving.
FAQ
Why is it called a “naked cake”?
A naked cake has minimal or no frosting on the exterior, allowing the cake layers to show through. It’s a style that became popular for its rustic, minimalist aesthetic that puts the focus on the quality of the cake itself.
Can I make this cake in advance?
Yes! The cake layers can be baked up to 3 days ahead and stored tightly wrapped at room temperature. The assembled cake is actually best made a day ahead, as the flavors have time to meld and the small amount of frosting forms a protective barrier that keeps the cake moist.
Can I use this recipe for cupcakes instead?
Absolutely. This batter will make about 24 cupcakes. Bake at the same temperature for 18-20 minutes, then top with a small swirl of buttercream for “semi-naked” cupcakes.
Why did my cake layers sink in the middle?
This typically happens from opening the oven door too early in the baking process or from underbaking. Make sure your oven is fully preheated before baking, and resist opening the door until at least 20 minutes have passed.
How do I add flowers to my naked cake safely?
Use food-safe flowers (like roses, lavender, or edible flowers), and either insert the stems into small food-safe tubes filled with water or wrap the stems in floral tape before inserting them into the cake. Always place flowers immediately before serving and remove them before cutting.decoration, this vanilla naked cake recipe deserves a permanent place in your repertoire..
Vanilla naked cake
Course: DessertsCuisine: AmericanDifficulty: Intermediate12
slices40
minutes25
minutes420
kcal1
hour5
minutesPerfectly tender vanilla cake layers with minimal frosting for a stunning naked cake presentation. Features a velvety crumb and pure vanilla flavor with just enough buttercream.
Ingredients
- For the Cake:
3 cups (345g) – Cake flour
1 3/4 cups (350g) – Granulated sugar
3/4 tsp (4g) – Salt
1 cup (226g) – Unsalted butter (room temperature, cubed)
5 large – Egg whites (room temperature)
1/2 cup (120g) – Sour cream (room temperature)
1 cup (240ml) – Whole milk (room temperature)
1 tbsp (15ml) – Pure vanilla extract
- For the Vanilla Buttercream:
1 1/2 cups (340g) – Unsalted butter (room temperature)
4 cups (480g) – Powdered sugar (sifted)
1 tbsp (15ml) – Pure vanilla extract
2 teaspoons pure vanilla extract (for frosting)
1/4 tsp (1.5g) – Salt
3 tbsp (45ml) – Heavy cream (room temperature)
Fresh berries for decoration (optional)
Directions
- Preheat oven to 350°F (175°C). Grease three 6-inch cake pans, line bottoms with parchment paper, and grease parchment.
- Sift cake flour, sugar, baking powder, and salt in stand mixer bowl.
- Add butter pieces gradually with mixer on low until mixture resembles coarse sand (3-4 minutes).
- Whisk egg whites, sour cream, milk, and vanilla in separate bowl until combined.
- Pour half the wet ingredients into dry mixture. Beat on medium for 30 seconds. Scrape bowl.
- Add remaining wet ingredients and beat on medium for 30 seconds until smooth.
- Divide batter evenly between pans (about 350g each). Tap pans to remove air bubbles.
- Bake 25-28 minutes until toothpick comes out clean and tops spring back when pressed.
- Cool in pans 10 minutes before removing to wire rack to cool completely.
- For buttercream: Beat butter on medium-high for 5 minutes until fluffy.
- Add powdered sugar, vanilla, salt, and cream. Mix on low until incorporated, then on medium-high for 3-4 minutes until smooth.
- Level cooled cake layers if needed.
- Place first layer on cake board. Spread 1/2 cup buttercream on top.
- Add second layer, another 1/2 cup buttercream, then final layer (upside down).
- Apply thin layer of buttercream to entire cake (crumb coat).
- Use bench scraper to remove most frosting from sides, creating naked effect.
- Smooth top with offset spatula. Refrigerate 30 minutes before decorating as desired.
Notes
- 1. Room temperature ingredients are essential for proper emulsification and a tender crumb.
2. The reverse creaming method takes longer but creates the perfect velvety texture for a naked cake.
3. Apply more frosting than needed, then scrape away for the ideal “naked” look rather than trying to add more later.