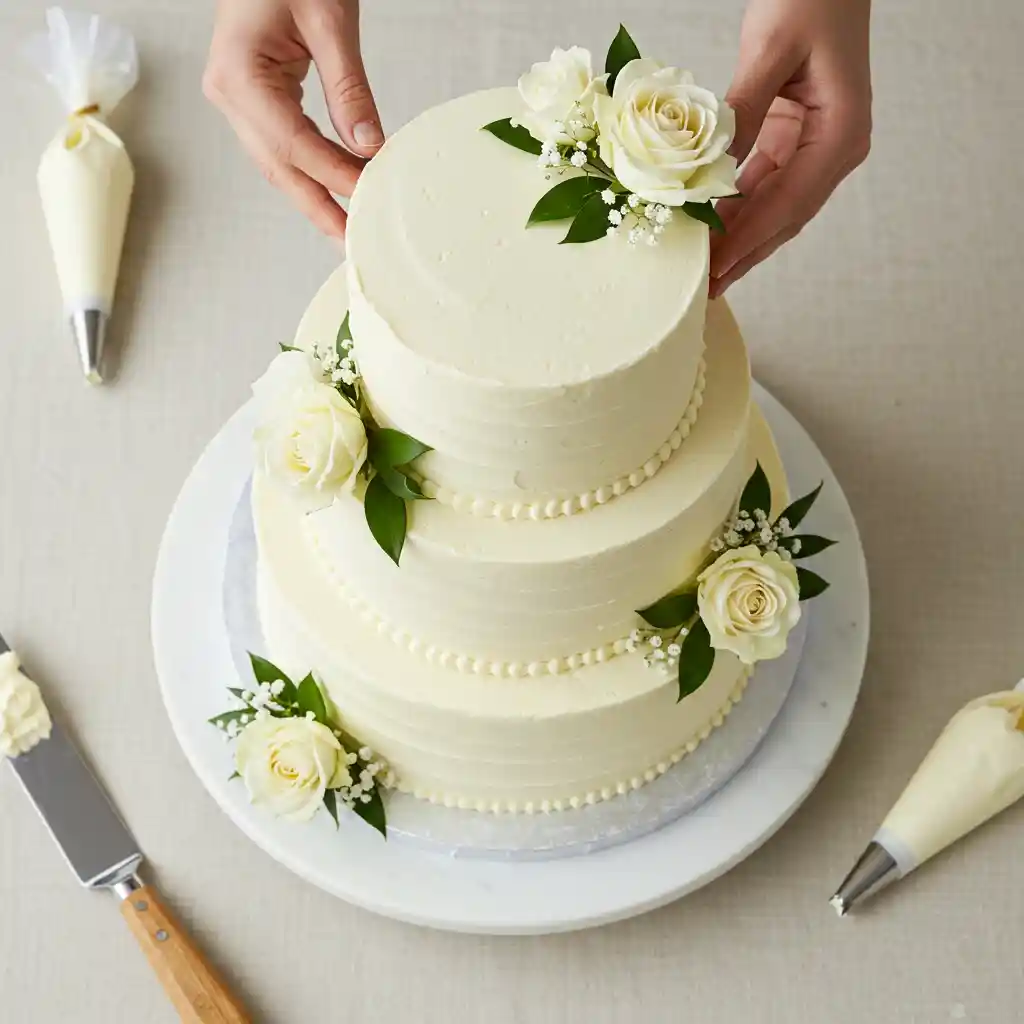
DIY Homemade Wedding Cake: Professional Results with Foolproof Methods
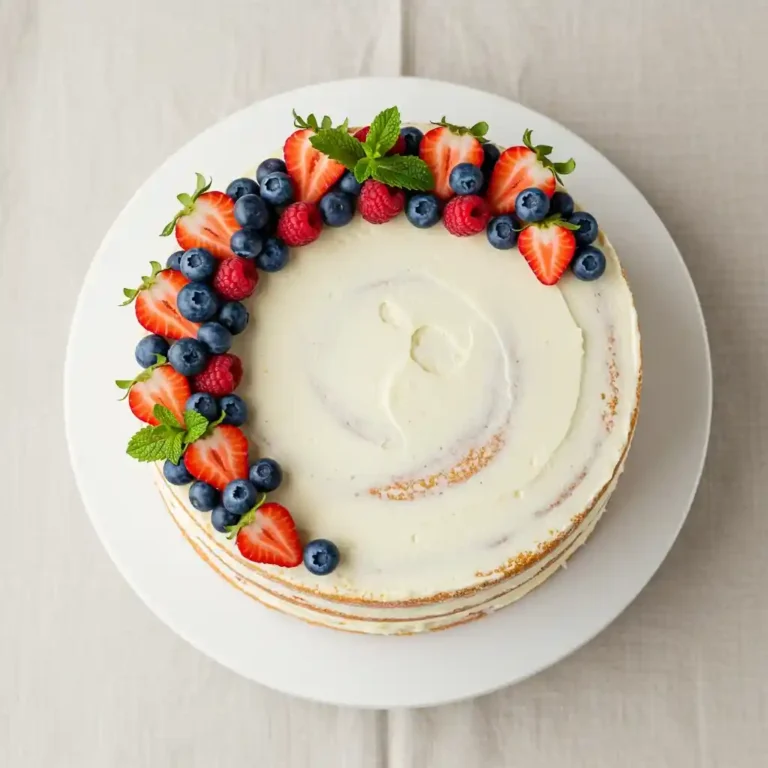
The first slice reveals everything – velvety vanilla cake with a crumb so tender it practically melts on your fork, filled with silky Swiss meringue buttercream that’s perfectly balanced between sweet and rich.
After making wedding cakes for seven family members and countless friends, I’ve refined this homemade wedding cake recipe to be genuinely achievable for home bakers.
You don’t need professional equipment or years of training – just this tested method that breaks everything down into manageable steps spread over several days.
The secret lies in my reverse-creaming technique for incredibly stable cake layers and a buttercream that stays smooth even in summer heat.
Why This Recipe Works
- Cake flour combined with all-purpose flour creates the perfect balance between structure (needed for stacking) and tenderness (for that melt-in-your-mouth texture).
- Reverse creaming method produces cake layers with minimal doming and a tight, velvety crumb that slices cleanly without crumbling – essential for a wedding cake.
- Swiss meringue buttercream remains stable at room temperature for hours longer than American buttercream and doesn’t crust or get too sweet.
- Three-day timeline prevents last-minute stress and allows you to handle any issues that arise without panic.
Ingredient Notes & Substitutions
Cake flour creates tenderness in your layers. In a pinch, you can substitute by replacing 2 tablespoons of all-purpose flour with 2 tablespoons of cornstarch for each cup of cake flour needed.
Unsalted butter gives you control over the salt content in both cake and frosting. European-style butter with higher fat content (like Kerrygold or Plugra) creates an even richer flavor and texture but regular butter works perfectly well.
Full-fat sour cream adds moisture and tenderness to the cake while also preventing it from drying out over the multi-day preparation process. Greek yogurt can substitute in equal amounts if needed.
Clear vanilla extract keeps the cake color pristinely white for traditional wedding cakes. Regular vanilla extract tastes identical but will tint your cake and frosting slightly ivory. Nielsen-Massey makes an excellent clear vanilla that doesn’t taste artificial.
Large egg whites provide structure without adding the yellow color that comes from yolks. I recommend using pasteurized egg whites from a carton for the frosting (they’re safer for a room-temperature dessert), but separate fresh eggs for the cake layers for best texture.
Fine granulated sugar (not powdered) dissolves more easily in the egg whites for the Swiss meringue buttercream. If your sugar feels coarse, pulse it in a food processor a few times to make it finer.
Essential Equipment
Cake pans in graduated sizes – typically 10″, 8″, and 6″ round pans for a classic three-tier wedding cake. Use pans that are at least 2″ deep. I recommend heavy-gauge aluminum pans (like Fat Daddio’s) for even baking and easy release.
Cake boards in sizes matching each cake tier, plus one larger board for the bottom tier. The boards provide crucial support when stacking and moving tiers. Get sturdy ones at least 1/4″ thick.
Dowel rods or cake support systems prevent the weight of upper tiers from crushing lower ones. Plastic drinking straws can work in a pinch for light cakes, but wooden dowels or specialized plastic cake supports offer better stability for peace of mind.
Stand mixer with whisk and paddle attachments is practically non-negotiable for wedding cakes. The power needed for creaming butter and whipping egg whites to stiff peaks is difficult to achieve by hand, especially in the quantities needed.
Cake turntable allows you to frost smoothly and evenly. This is a worthwhile investment (around $30) that makes a dramatic difference in your finished appearance. The heavy cast aluminum ones rotate more smoothly than plastic versions.
Offset spatulas (both large and small) give you the control needed for perfectly smooth frosting. The angled blade lets you get right against the sides of the cake without knuckle marks.
Cake leveler or long serrated knife ensures perfectly flat layers. Even slight doming can make a stacked cake unstable.
Step-by-Step Instructions
Day 1: Baking the Cake Layers
Position oven racks to accommodate your cake pans and preheat to 325°F (lower than standard 350°F to prevent doming). Prepare your pans by greasing, lining with parchment circles, and greasing again.
In the bowl of your stand mixer, sift together the cake flour, all-purpose flour, sugar, baking powder, and salt.
Cut the butter into small cubes and, with the mixer on low speed, add the butter one piece at a time. Continue mixing for 3-4 minutes until the mixture resembles coarse sand with no large butter chunks remaining. This is the reverse-creaming method that creates our stable, velvety texture.
In a separate bowl, whisk together the egg whites, sour cream, milk, and clear vanilla until well combined.
With the mixer running on low, pour in half of the wet ingredients. Increase to medium speed and beat for 30 seconds. Scrape down the sides and bottom of the bowl.
Add the remaining wet ingredients and mix on medium for another 30 seconds until the batter is smooth and no lumps remain. The batter will be thicker than box mix batters – this is correct.
Divide the batter between your prepared pans according to the following approximate amounts:
- 6″ pans: 2 cups (450g) batter each
- 8″ pans: 3½ cups (800g) batter each
- 10″ pans: 6 cups (1350g) batter each
Tap the pans gently on the counter to release air bubbles.
Bake until a toothpick inserted in the center comes out with a few moist crumbs:
- 6″ cakes: 30-35 minutes
- 8″ cakes: 35-40 minutes
- 10″ cakes: 40-45 minutes
Cool in pans for 10 minutes, then turn out onto cooling racks to cool completely.
Once cool, wrap each layer tightly in plastic wrap and refrigerate overnight. This makes them firmer and easier to work with when leveling and frosting.
Day 2: Make Buttercream & Assemble Tiers
Making Swiss Meringue Buttercream
Place egg whites and sugar in the bowl of your stand mixer. Whisk together by hand until combined.
Create a double boiler by placing the mixer bowl over a saucepan of simmering water, ensuring the water doesn’t touch the bowl.
Whisk constantly while heating the egg white mixture to 160°F (70°C) on a candy thermometer. The sugar should be completely dissolved; rub a small amount between your fingers – it shouldn’t feel grainy.
Transfer the bowl to your stand mixer fitted with the whisk attachment. Beat on medium-high speed until stiff, glossy peaks form and the mixture has cooled to room temperature, about 8-10 minutes. The bowl should no longer feel warm to the touch.
Switch to the paddle attachment and beat on medium speed. Add butter one tablespoon at a time, allowing each addition to incorporate before adding the next.
Once all butter is added, continue beating until the frosting comes together. If it looks curdled, keep beating – it will smooth out.
Add vanilla extract and salt, beating until incorporated. If the buttercream is too soft, refrigerate for 15-20 minutes, then beat again before using.
Assembling Each Tier
Remove cake layers from the refrigerator. Using a cake leveler or long serrated knife, level the tops of each cake to create flat surfaces.
For each tier, place the first layer on a cake board that matches its diameter.
Spread an even layer of buttercream (about ¼” thick) on top using an offset spatula.
Place the second layer on top and repeat with buttercream if making 3-layer tiers.
Add the final layer upside down (flat bottom facing up) to create a perfectly flat top.
Apply a thin crumb coat of buttercream over the entire tier. Refrigerate for 30 minutes to set this base layer.
Apply the final coat of buttercream, smoothing the sides and top with an offset spatula and bench scraper. Return to the refrigerator to firm up while you repeat with the remaining tiers.
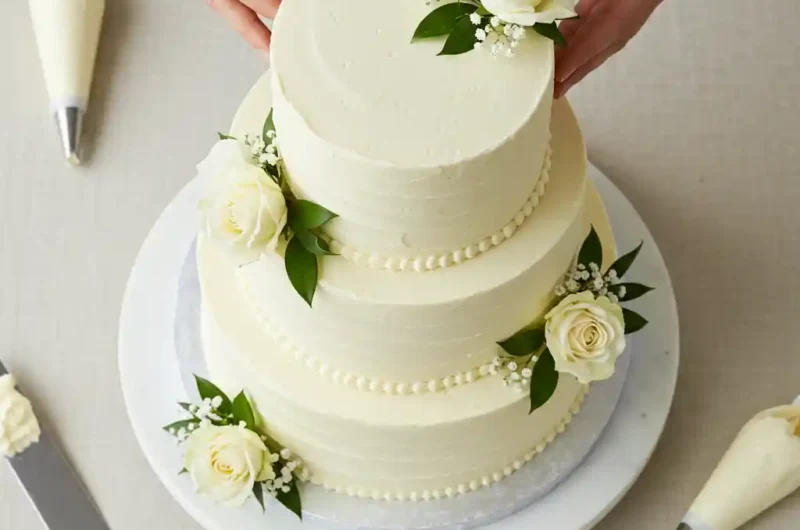
Day 3: Stacking and Decorating
Prepare your supports by measuring the height of your bottom tier and cutting dowels to match. Insert 4-6 dowels in a circle in the center of the bottom tier, where the next tier will sit.
Carefully place the middle tier (on its cake board) centered on top of the supports in the bottom tier.
Repeat the process with supports for the middle tier before adding the top tier.
Fill any gaps between tiers with extra buttercream or decorations like fresh flowers or piped designs.
Add final decorative touches like buttercream piping, fresh flowers, or other decorative elements.
Expert Tips for Success
- Make extra batter and frosting – about 25% more than you think you need. Running out of either mid-project is incredibly stressful and difficult to color-match later.
- Do a “dress rehearsal” of stacking the tiers the night before to ensure everything fits. Then un-stack and refrigerate tiers separately overnight.
- Transport tiers separately to the venue if possible. Assemble on site to prevent disaster if you hit a pothole or need to brake suddenly.
- Bring an emergency kit with extra buttercream, offset spatula, piping bag, and decorative elements to fix any last-minute issues at the venue.
- If your buttercream separates or looks curdled, don’t panic! Either warm it gently by pressing a hot towel against the bowl while beating, or refrigerate if it’s too warm. Keep beating and it will come together.
Flavor Variations
Lemon-Raspberry Wedding Cake
Add the zest of 2 lemons to the cake batter and replace ¼ cup of milk with fresh lemon juice. Fill layers with lemon buttercream (add 2 tablespoons lemon juice and 1 tablespoon zest to the buttercream) and a thin layer of raspberry preserves.
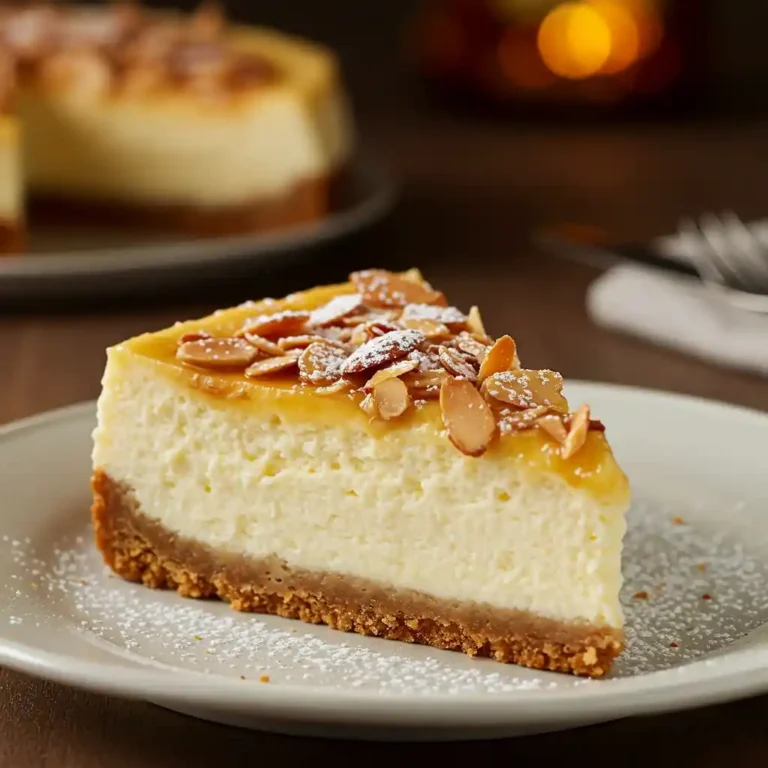
Almond Wedding Cake
Replace the clear vanilla with 1 tablespoon of pure almond extract in the cake batter and add ½ teaspoon to the buttercream. Optionally, add ¼ cup of finely ground almonds to the dry ingredients for subtle texture.
Champagne Wedding Cake
Replace half the milk with flat champagne in the cake recipe and add 2 tablespoons of champagne to the buttercream. The alcohol cooks out, leaving a subtle fruity flavor that feels festive and special.
Storage & Freezing
The assembled unfrosted cake layers can be wrapped in plastic wrap and refrigerated for up to 5 days or frozen for up to 3 months. Thaw frozen layers overnight in the refrigerator before assembling.
Buttercream can be made up to 1 week ahead and stored in the refrigerator. Bring to room temperature and beat again before using.
The completed cake tiers (before stacking) can be refrigerated for up to 2 days. The fully assembled cake is best enjoyed within 24 hours but will stay fresh refrigerated for up to 3 days.
Leftover cake can be stored in the refrigerator for up to 1 week. For longer storage, freeze individual slices wrapped in plastic wrap and foil for up to 3 months. Thaw in the refrigerator overnight.
FAQ
How far in advance can I make a wedding cake?
You can bake the cake layers up to 3 months ahead and freeze them. Thaw in the refrigerator 2 days before assembly. The buttercream can be made 1 week ahead. Final assembly should happen 1-2 days before the wedding.
Can I use box cake mixes instead of making from scratch?
Yes, but add an extra egg to each box and substitute butter for the oil to create a sturdier cake that will hold up to stacking. Box mixes typically create softer cakes that can compress under the weight of multiple tiers.
How many people will my cake serve?
A standard three-tier cake (10″, 8″, and 6″) serves approximately 75-100 people with wedding-sized slices (1″x2″). For larger weddings, consider adding a 12″ bottom tier which increases the serving count to around 150.
Do I need special cake pans or can I use regular ones?
Regular cake pans work fine as long as they’re at least 2″ deep. Professional bakers often use 3″ deep pans for wedding cakes, but for home bakers, standard pans will work well. Just don’t use shallow 1″ pans.
Can I make a wedding cake without a stand mixer?
While technically possible, it’s extremely difficult. The Swiss meringue buttercream requires extended beating that’s challenging to achieve by hand. If absolutely necessary, use a powerful hand mixer and prepare for a workout.for a once-in-a-lifetime day.
Homemade Wedding Cake
Course: DessertsCuisine: AmericanDifficulty: Advanced75
slices3
hours2
hours410
kcal8
hoursCreate a professional three-tier wedding cake at home with this foolproof recipe featuring tender vanilla layers and silky Swiss meringue buttercream that stays stable for hours.
Ingredients
- For the Vanilla Cake Layers:
5 cups (580g) – Cake flour
3 cups (375g) – All-purpose flour
6 cups (1200g) – Granulated sugar
2 tbsp (30g) – Baking powder
2 tsp (12g) – Salt
3 cups (680g) – Unsalted butter (room temperature, cubed)
20 large – Egg whites (room temperature)
2 cups (480g) – Full-fat sour cream (room temperature)
2 cups (480ml) – Whole milk (room temperature)
3 tbsp (45ml) – Clear vanilla extract
- For the Swiss Meringue Buttercream:
16 large (480g) – Egg whites
4 cups (800g) – Granulated sugar
6 cups (1360g) – Unsalted butter (room temperature, cubed)
2 tbsp (30ml) – Clear vanilla extract
1 tsp (6g) – Salt
- For Assembly:
12 – Wooden dowel rods or cake supports
3 – Cake boards (6″, 8″, and 10″)
1 – Cake drum (14″ for the base)
Directions
- Day 1: Baking
- Preheat oven to 325°F (165°C). Grease and line two each of 6″, 8″, and 10″ cake pans with parchment.
- Sift together cake flour, all-purpose flour, sugar, baking powder, and salt in stand mixer bowl.
- Add butter cubes gradually on low speed, mixing until mixture resembles coarse sand (3-4 minutes).
- Whisk egg whites, sour cream, milk, and vanilla in separate bowl until combined.
- Pour half the wet ingredients into dry mixture. Beat on medium for 30 seconds. Scrape bowl.
- Add remaining wet ingredients, beat on medium for 30 seconds until smooth.
- Divide batter between prepared pans: 2 cups per 6″ pan, 3½ cups per 8″ pan, 6 cups per 10″ pan.
- Bake until toothpick comes out with few moist crumbs: 30-35 minutes for 6″ pans, 35-40 minutes for 8″ pans, 40-45 minutes for 10″ pans.
- Cool in pans 10 minutes, then remove to cooling racks. Once cool, wrap in plastic and refrigerate overnight.
- Day 2: Buttercream & Tier Assembly
- Place egg whites and sugar in stand mixer bowl, whisk to combine.
- Create double boiler with simmering water. Heat mixture to 160°F while whisking constantly.
- Beat on medium-high speed with whisk attachment until stiff peaks form and mixture cools (8-10 minutes).
- Switch to paddle attachment. Add butter one tablespoon at a time while beating on medium.
- Continue beating until buttercream becomes smooth. Add vanilla and salt.
- Level chilled cake layers with serrated knife or cake leveler.
- Place first layer of each tier on corresponding cake board.
- Add ¼” layer of buttercream between each cake layer within each tier.
- Apply thin crumb coat to each tier, refrigerate 30 minutes.
- Apply final coat of buttercream to each tier, smooth sides and top. Refrigerate overnight.
- Day 3: Stacking & Decorating
- Insert 4-6 dowels in circle in center of bottom tier where middle tier will sit.
- Carefully place middle tier (on its board) centered on bottom tier.
- Insert 4 dowels in middle tier where top tier will sit.
- Place top tier centered on middle tier.
- Fill gaps between tiers with extra buttercream or decorations.
- Add final decorative touches like piping, fresh flowers, or other elements.
Notes
- 1. Make 25% more batter and frosting than you think you’ll need to avoid running out mid-project.
2. Transport tiers separately to the venue and stack on site for safest results.
3. The reverse-creaming method (adding butter to dry ingredients first) is essential for creating the stable, velvety texture needed for stacking.