Easy Blender Brownies (One-Bowl Method)
Blender brownies eliminate the bowl, whisk, and cleanup—toss everything into your blender, pulse for 30 seconds, and pour into a pan. The blades emulsify butter and sugar into a glossy batter that bakes into fudgy, crackly-topped squares.
Quick Summary
Perfect when you want homemade brownies without the mess. The blender method creates supremely smooth texture while cutting prep time in half, giving you bakery-quality results with literally one dirty dish.
Why This Recipe Works
- High-speed blending emulsifies butter and eggs into a smooth base that creates the signature shiny, crackly top
- Cocoa powder addition last prevents clumping and ensures even chocolate distribution without overmixing
- Minimal flour ratio keeps the texture dense and fudgy rather than cakey
- Room temperature eggs blend instantly without needing extended mixing time
- Pulse method control prevents overworking the batter, which would create tough brownies
Ingredients Notes
Unsalted Butter melted and slightly cooled provides richness and creates the fudgy crumb. The blender emulsifies it completely, so no creaming step needed.
Granulated Sugar dissolves during blending and creates the crackly, paper-thin top crust as it caramelizes during baking.
Large Eggs bind the batter and add structure. Room temperature eggs blend faster and more evenly than cold eggs straight from the fridge.
Vanilla Extract enhances the chocolate depth and rounds out any bitter notes from the cocoa powder.
All-Purpose Flour provides just enough structure to hold the brownies together. Too much creates a cakey texture, which is why this recipe uses less than traditional methods.
Unsweetened Cocoa Powder delivers intense chocolate flavor. Dutch-process creates smoother, darker brownies while natural cocoa adds slight tang. Either works perfectly.
Salt amplifies the chocolate intensity and balances the sweetness.
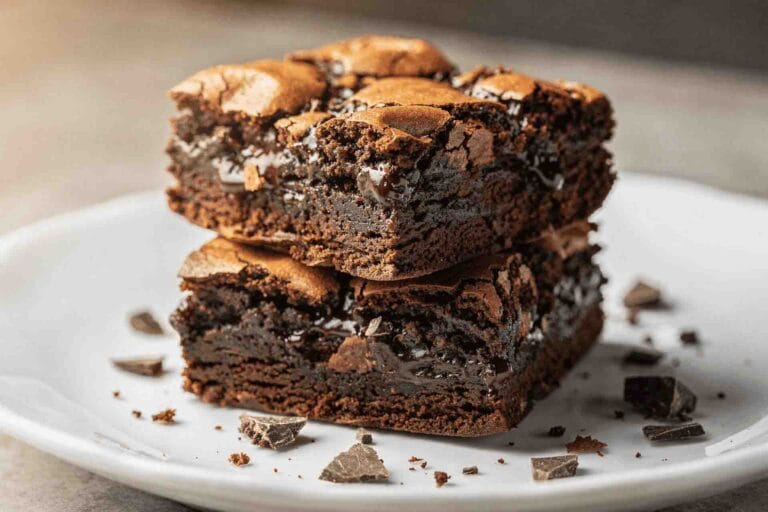
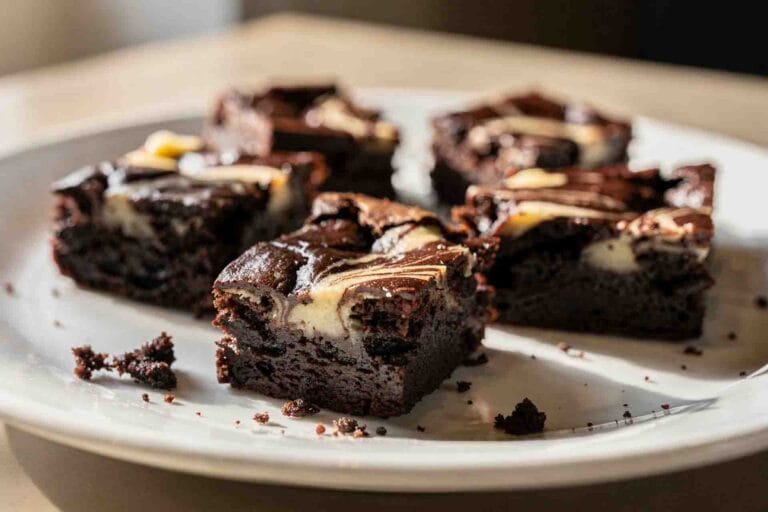
Chocolate Chips (optional) create melty pockets throughout. The blender won’t chop them, so fold in by hand after blending.

How to Make Blender Brownies
Prepare the Pan
Line an 8×8-inch baking pan with parchment paper, leaving overhang on two sides for easy removal. This creates handles for lifting the brownies out cleanly. Spray the parchment lightly or the brownies may stick at the corners.
Preheat your oven to 350°F. Place the rack in the center position for even heat distribution.
Blend the Base
Add melted butter and sugar to the blender. Pulse 3-4 times just until combined—the mixture will look grainy and pale yellow. Add eggs and vanilla. Blend on low speed for 15 seconds until the mixture turns smooth and glossy. The color should shift to light tan.
Stop the blender and scrape down the sides with a spatula. Any sugar stuck to the walls won’t incorporate during the next step.
Add Dry Ingredients
Add flour, cocoa powder, and salt on top of the wet mixture. Pulse 5-6 times, stopping to check between pulses. The batter should look uniformly dark brown with no flour streaks or cocoa clumps. Avoid blending continuously—pulsing gives you control and prevents overworking the gluten.
The finished batter will be thick and glossy, somewhere between cake batter and cookie dough in consistency. If using chocolate chips, remove the blender jar and fold them in with a spatula.
Bake and Cool
Pour the batter into your prepared pan. Use a spatula to spread it evenly into the corners—blender batters are thick and won’t self-level. Tap the pan on the counter twice to release air bubbles.
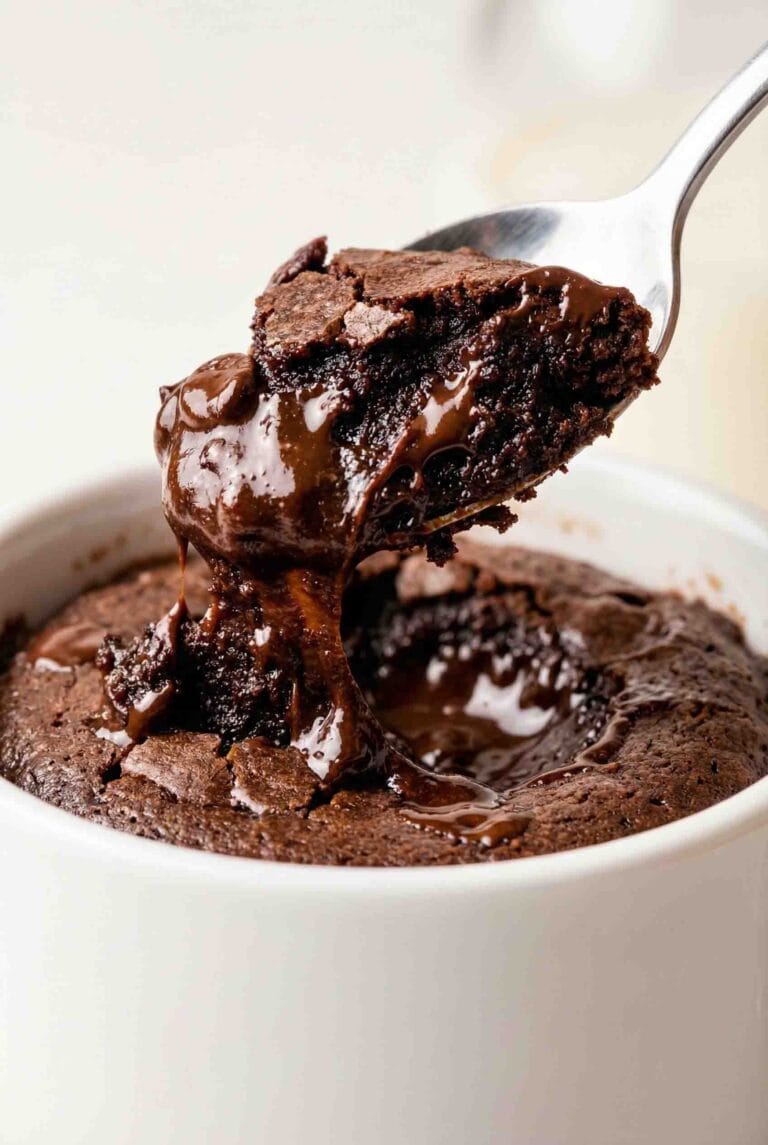
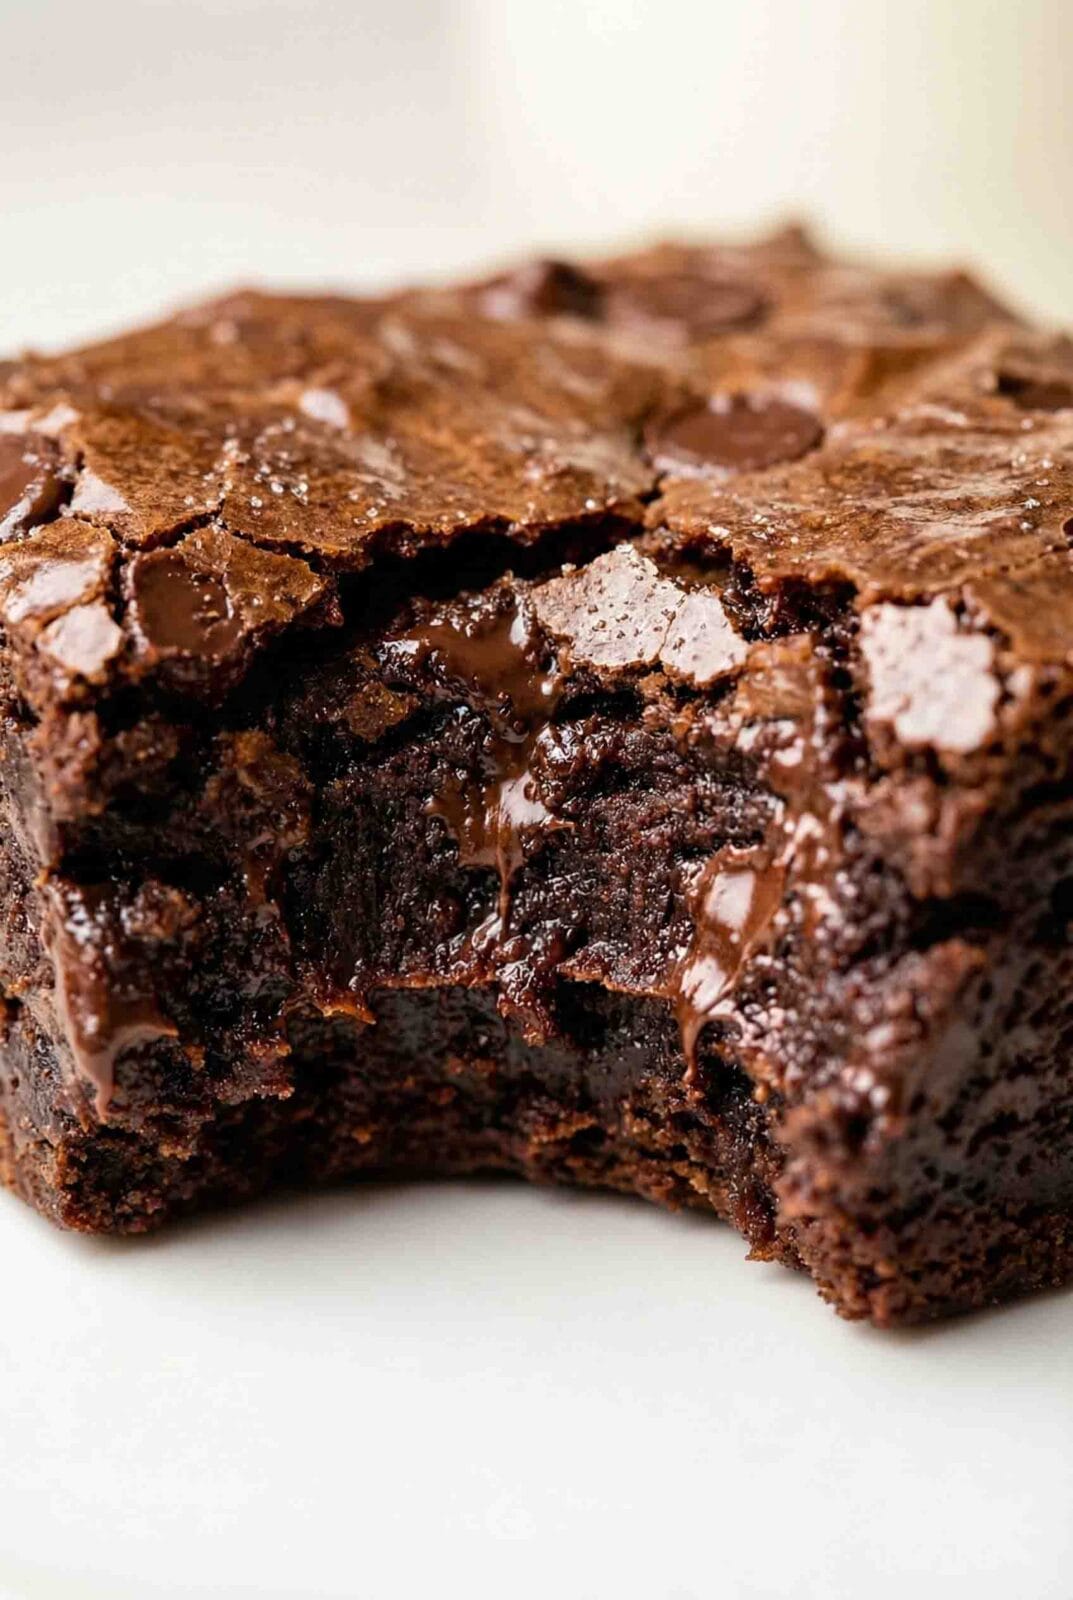
Bake for 25-30 minutes. The brownies are done when the edges look set and pull slightly away from the pan while the center still appears slightly glossy. A toothpick inserted two inches from the edge should come out with a few moist crumbs, not wet batter.
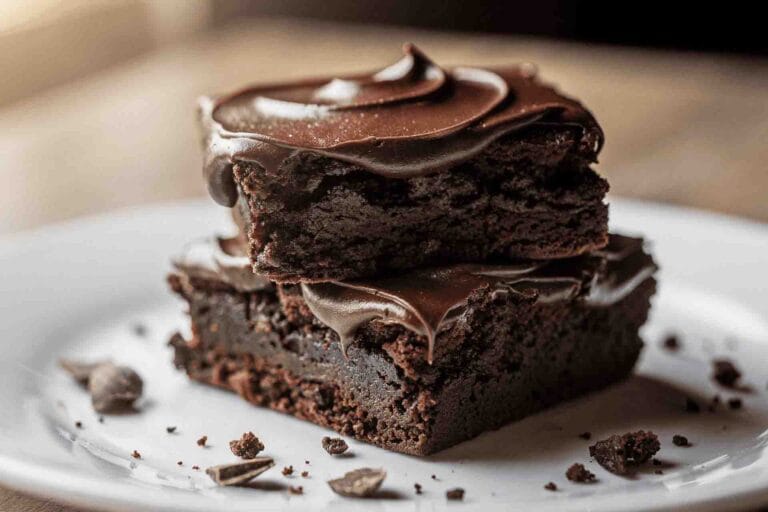
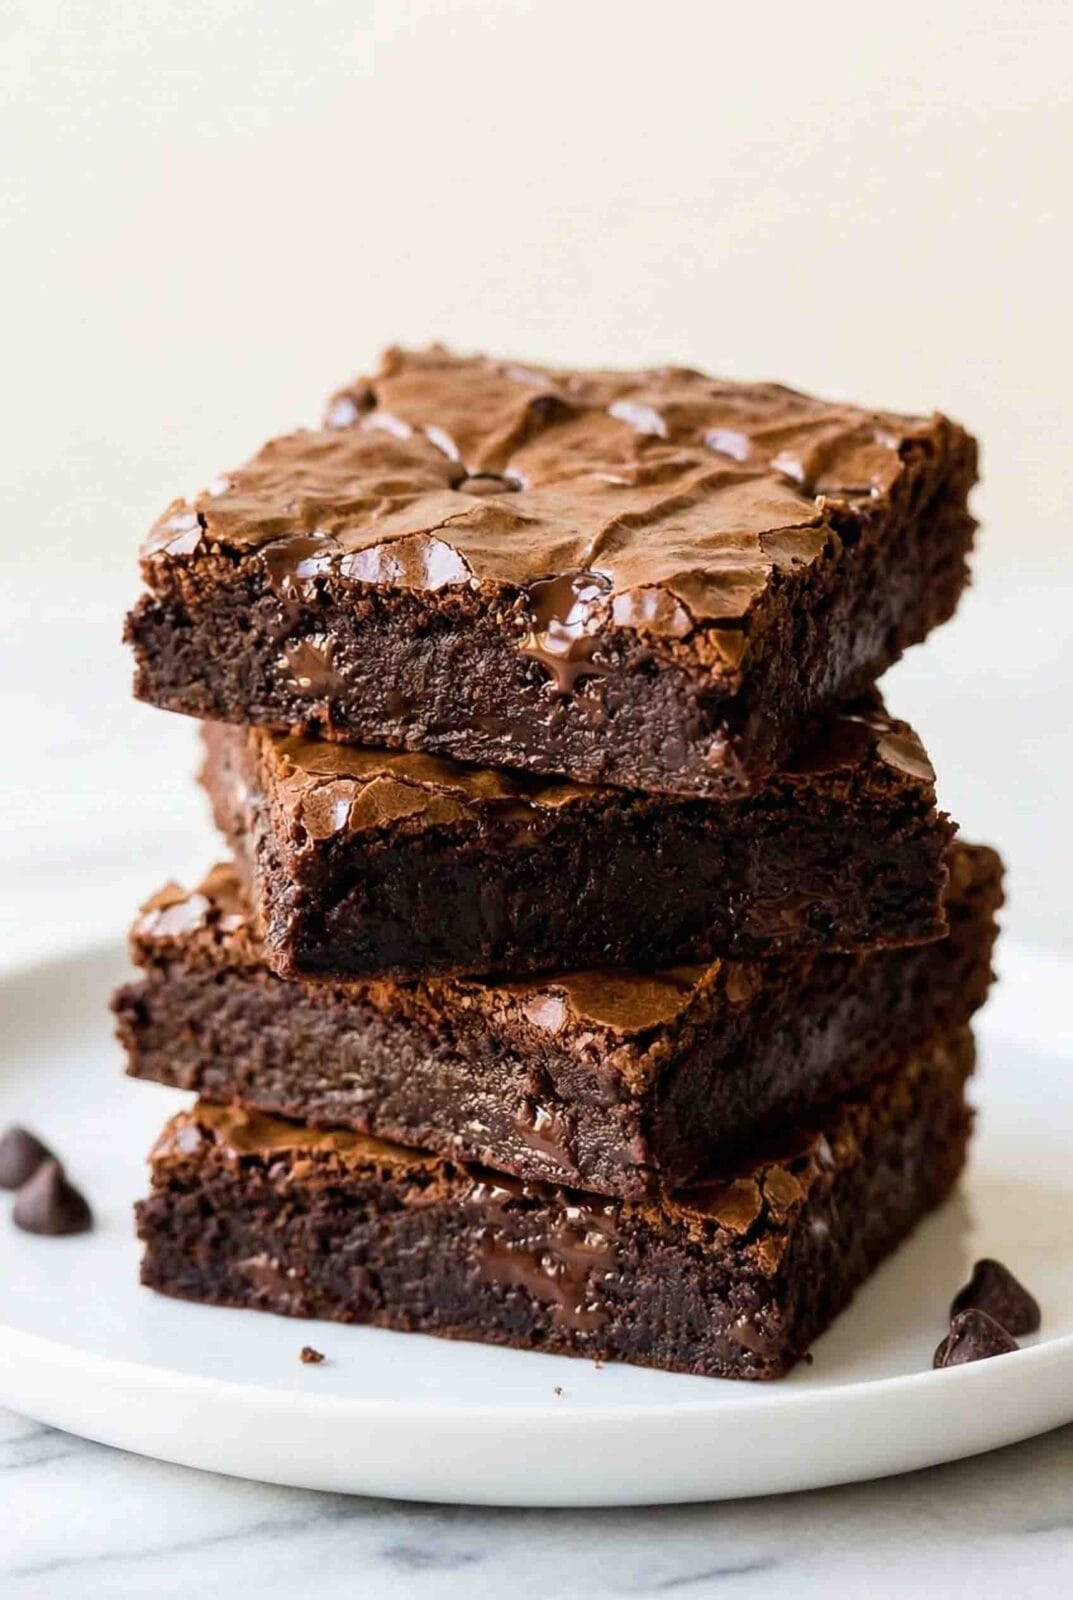
Let the pan cool on a wire rack for at least 30 minutes. The brownies will firm up as they cool. Use the parchment handles to lift the entire block out, then slice into 16 squares.
Pro Tip
Add the cocoa powder last and pulse gently—over-blending after adding cocoa creates a grainy texture and can cause the chocolate flavor to taste flat. The batter should come together in under 10 pulses total after the cocoa goes in.
Expert Tips
- The batter will look thick and almost too dense compared to traditional brownie batter. This is correct—blender batters don’t incorporate as much air.
- Stop blending when you no longer see flour or cocoa streaks. Even one extra pulse can toughen the texture.
- The top should look slightly underbaked when you remove the pan. It will continue setting during the cooling period and develop the perfect fudgy center.
- Use a plastic or silicone spatula to scrape the blender jar. Metal utensils can scratch the container and dull the blades over time.
- Room temperature butter blends more smoothly than hot melted butter, which can start cooking the eggs on contact.
Storage & Freezing
Room Temperature: Store in an airtight container for up to 4 days. Place parchment paper between layers to prevent sticking. The brownies will firm slightly but stay fudgy at the center.
Refrigerator: Keep covered for up to 1 week. Cold brownies become very dense and fudge-like. Bring to room temperature for 20 minutes before serving, or microwave individual pieces for 10-15 seconds.
Freezing: Wrap individual brownies in plastic wrap, then place in a freezer bag for up to 3 months. Freeze in a single layer first to prevent sticking. Thaw at room temperature for 1 hour or microwave from frozen for 20-30 seconds.
Make-Ahead: Bake and cool completely, then cover tightly and store at room temperature overnight. The flavor actually improves after 24 hours as the chocolate notes develop.
FAQ
Can I use a food processor instead of a blender?
Yes, food processor brownies work perfectly with the same method. The wider bowl means you may need to stop and scrape down the sides more frequently to ensure even mixing.
Why are my blender brownies tough?
Over-blending after adding the flour is the most common cause. Pulse just until the dry ingredients disappear. Extended blending develops gluten, which creates chewy, tough texture.
Can I double this recipe?
Yes, but blend in two separate batches rather than overloading your blender. Pour both batches into a 9×13-inch pan and add 5-8 minutes to the bake time.
Do I need a high-powered blender?
No. Standard blenders work fine since you’re not blending anything tough or frozen. Even older models handle the smooth ingredients easily.
Can I add mix-ins like nuts or espresso powder?
Fold in nuts, chocolate chunks, or other mix-ins by hand after blending. Add espresso powder (1 teaspoon) with the cocoa powder during the pulsing step for deeper chocolate flavor.

Easy Blender Brownies (One-Bowl Method)
Course: DessertCuisine: AmericanDifficulty: Easy16
brownies5
minutes28
minutes165
kcal33
minutesFudgy blender brownies made in one blender—no bowls, no mixer, minimal cleanup. Pulse ingredients for 30 seconds and bake for crackly-topped chocolate perfection.
Ingredients
1/2 cup Unsalted Butter – melted and slightly cooled
1 cup Granulated Sugar
2 Large Eggs – room temperature
1 teaspoon Vanilla Extract
1/2 cup All-Purpose Flour – spooned and leveled
1/2 cup Unsweetened Cocoa Powder
1/4 teaspoon Salt
1/2 cup Chocolate Chips – optional
Directions
- Preheat oven to 350°F. Line an 8×8-inch baking pan with parchment paper, leaving overhang on two sides. Spray lightly with cooking spray.
- Add melted butter and sugar to the blender. Pulse 3-4 times until combined. Add eggs and vanilla. Blend on low speed for 15 seconds until smooth and glossy. Scrape down sides with a spatula.
- Add flour, cocoa powder, and salt on top of the wet mixture. Pulse 5-6 times, stopping to check between pulses, until no flour streaks or cocoa clumps remain. Do not over-blend.
- If using chocolate chips, remove the blender jar and fold them in with a spatula. Pour batter into prepared pan and spread evenly into corners. Tap pan twice on counter to release air bubbles.
- Bake for 25-30 minutes until edges are set and center looks slightly glossy. A toothpick inserted 2 inches from the edge should have moist crumbs, not wet batter. Cool in pan for 30 minutes before lifting out and slicing.
Notes
- Pulse, don’t blend continuously, after adding dry ingredients—over-blending creates tough brownies.
- The batter will be very thick compared to traditional brownie batter. This is correct.
- Let butter cool for 5 minutes after melting to prevent cooking the eggs on contact.